In diesem Beitrag zeige ich dir, wie du die Robonect Integration in Home Assistant hinzufügen kannst. Du besitzt einen Rasenmäherroboter von Husqvarna, Gardena oder Flymo und hast dir das Robonect Modul zugelegt, dann kannst du nun mit der Integration von Geert Meersmann (https://github.com/geertmeersman/robonect, Vielen Dank) deinen Mäher in Home Assistant hinzufügen.
Installation
Um die Integration in Home Assistant hinzufügen zu können, benötigst du den Home Assistant Community Store (HACS). Nach der Integration vom HACS klickst du auf HACS → Integrationen → rechts oben auf die drei Punkte (Hamburgermenü) → Benutzerdefinierte Repositories. Im folgenden Fenster trägst du unter Repository
geertmeersman/robonect
ein. Als Kategorie wählst du Integration aus. Anschließend fügst du die Repository hinzu.
Klicke nun auf der Integrationsseite vom HACS rechts unten auf Repository durchsuchen und herunterladen. Nun lädst du die Integration herunter. Nach dem Herunterladen muss Home Assistant neu gestartet werden.
Nach dem Neustart von Home Assistant kannst du über Einstellungen → Geräte & Dienste → Integration hinzufügen die Integration hinzufügen. Zuletzt musst du noch die Integration konfigurieren. Als Verbindungsmethode wählst du sowohl MQTT als auch REST API aus. Aus dem Menü wählst du dein Gerät aus und trägst die Gerätebezeichnung deines Mähers ein. Als Hostadresse trägst du die Adresse von deinem Robonect ein. Beim Benutzernamen und Passwort trägst du die Zugriffsdaten zu deinem Robonect ein. Als Topic trägst du den MQTT Topic zu deinem Mäher ein (Anleitung findest du hier). ! der Topic sollte nicht mit Großbuchstaben beginnen. Den Aktualisierungsintervall kannst du nach Belieben wählen.
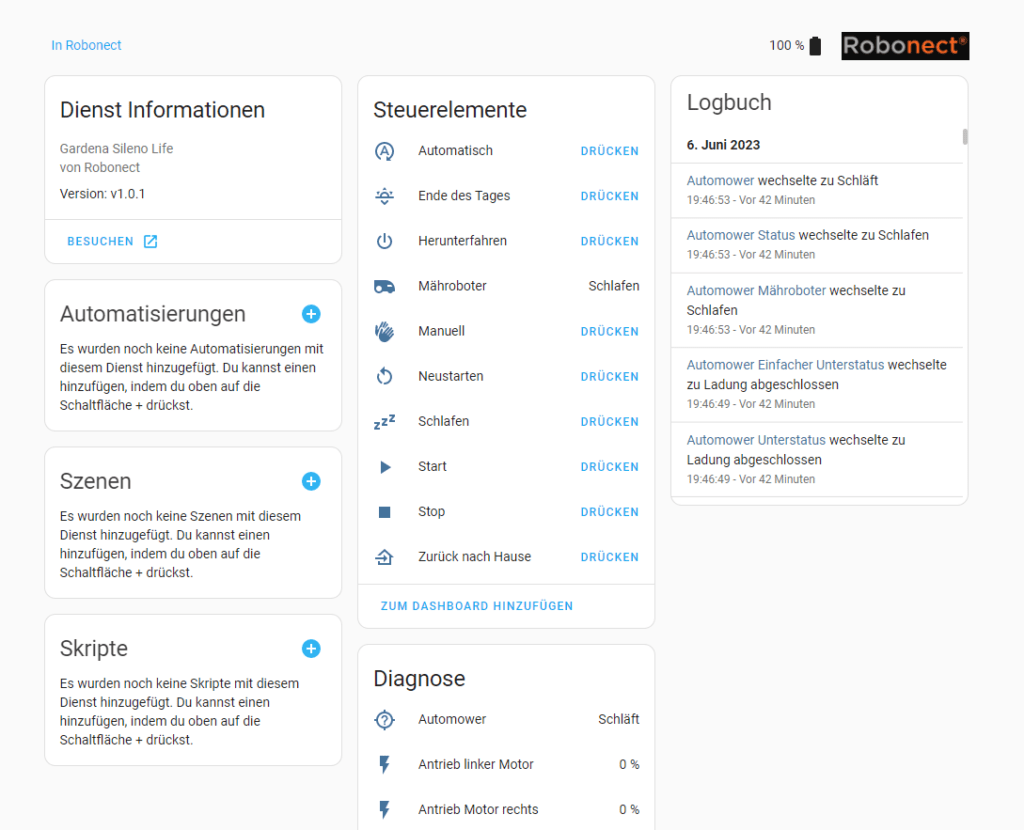
Nach einer kurzer Wartezeit wird nun die Robonect Integration in Home Assistant angezeigt.
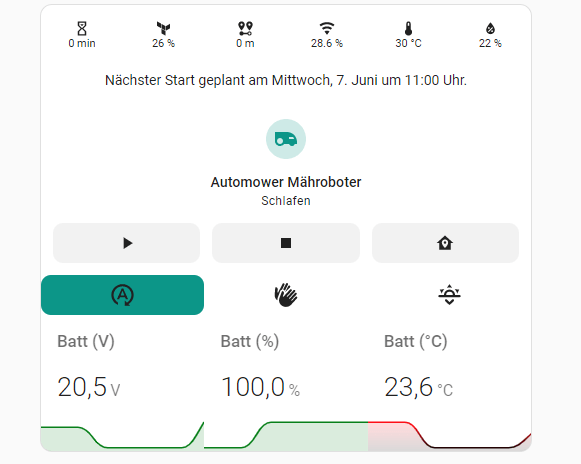
Dashboard Karte
Möchtest du diese Dashboardkarte für deinen Rasenmäherroboter haben? Dann zeige ich dir nun die Installation.
Für die Dashboardkarte benötigst du einige HACS Frontend Repositories.
- stack in Card
- mini-graph-card
- button-card
- card-mod
Alle benötigten Repositories kannst du über HACS → Frontend → Durchsuchen und Herunterladen von Repositories hinzufügen.
Um die Dashboardkarte deinem Dashboard hinzuzufügen, klickst du rechts oben auf die drei Punkte (im Dashboard) → Dashboard bearbeiten → Karte hinzufügen. Danach wählst du Manuell aus und fügst folgenden Code ein.
type: custom:stack-in-card
mode: vertical
keep:
  border_radius: true
cards:
  - type: horizontal-stack
    cards:
      - entity: sensor.automower_mower_status_duration
        show_entity_picture: true
        show_name: false
        font-size: 11px
        show_state: true
        show_label: true
        styles:
          card:
            - height: 40px
            - padding: 5px
            - margin-top: 10px
            - border-top: 1px solid var(--state-icon-color)
            - border: 0px solid var(--primary-background-color)
            - font-size: 11px
        type: custom:button-card
      - entity: sensor.automower_mower_blades_quality
        show_entity_picture: true
        show_name: false
        font-size: 11px
        show_state: true
        show_label: true
        styles:
          card:
            - height: 40px
            - padding: 5px
            - margin-top: 10px
            - border-top: 1px solid var(--state-icon-color)
            - border: 0px solid var(--primary-background-color)
            - font-size: 11px
        type: custom:button-card
      - entity: sensor.automower_mower_distance
        show_entity_picture: true
        show_name: false
        font-size: 11px
        show_state: true
        show_label: true
        styles:
          card:
            - height: 40px
            - padding: 5px
            - margin-top: 10px
            - border-top: 1px solid var(--state-icon-color)
            - border: 0px solid var(--primary-background-color)
            - font-size: 11px
        type: custom:button-card
      - entity: sensor.automower_wlan_rssi
        show_entity_picture: true
        show_name: false
        font-size: 11px
        show_state: true
        show_label: true
        styles:
          card:
            - height: 40px
            - padding: 5px
            - margin-top: 10px
            - border-top: 1px solid var(--state-icon-color)
            - border: 0px solid var(--primary-background-color)
            - font-size: 11px
        type: custom:button-card
      - entity: sensor.automower_health_climate_temperature
        show_entity_picture: true
        show_name: false
        font-size: 11px
        show_state: true
        show_label: true
        styles:
          card:
            - height: 40px
            - padding: 5px
            - margin-top: 10px
            - border-top: 1px solid var(--state-icon-color)
            - border: 0px solid var(--primary-background-color)
            - font-size: 11px
        type: custom:button-card
      - entity: sensor.automower_health_climate_humidity
        show_entity_picture: true
        show_name: false
        font-size: 11px
        show_state: true
        show_label: true
        styles:
          card:
            - height: 40px
            - padding: 5px
            - margin-top: 10px
            - border-top: 1px solid var(--state-icon-color)
            - border: 0px solid var(--primary-background-color)
            - font-size: 11px
        type: custom:button-card
  - type: conditional
    conditions:
      - entity: sensor.automower_mower_timer_next_unix
        state_not: Unknown
    card:
      type: markdown
      content: >
        {% set time =
        states.sensor.automower_mower_timer_next_unix.state|as_datetime %} {%
        set day = as_timestamp(time)|timestamp_custom('%d', true)|int %} {% set
        weekday = as_timestamp(time)|timestamp_custom('%w', true)|int %} {% set
        month = as_timestamp(time)|timestamp_custom('%m', true)|int -1 %} {% set
        weekday = ["Sonntag",
        "Montag","Dienstag","Mittwoch","Donnerstag","Freitag","Samstag"][weekday]
        %} {% set month = ["Januar",
        "Februar","März","April","Mai","Juni","Juli","August","September","Oktober","November","Dezember"][month]
        %} Nächster Start geplant am {{weekday}}, {{day}}. {{month}} {{
        as_timestamp(time)|timestamp_custom('um %H:%M Uhr.', true) }}
      card_mod:
        style: |
          ha-card {
            border-width: 0;
            text-align: center;
          }
  - type: tile
    entity: vacuum.automower_robonect
    show_entity_picture: true
    vertical: true
    features:
      - type: vacuum-commands
        commands:
          - start_pause
          - stop
          - return_home
    card_mod:
      style: |
        ha-card {
          border-width: 0;
        }
  - type: horizontal-stack
    style: |
      ha-card {
        margin-left: 10px;
      }
    cards:
      - show_name: false
        show_icon: true
        type: custom:button-card
        tap_action:
          action: call-service
          service: button.press
          service_data:
            entity_id: button.automower_auto
        entity: button.automower_auto
        styles:
          card:
            - height: 40px
            - border: 0px solid var(--primary-background-color)
            - background: |
                [[[
                  if (states['sensor.automower_mower_mode'].state == '0' )
                    return 'var(--state-vacuum-17-color, var(--state-vacuum-active-color, var(--state-active-color)))'
                  return ''
                ]]]
            - font-size: 11px
            - border-radius: 10px
            - '--keep-background': 'true'
      - show_name: false
        show_icon: true
        type: custom:button-card
        entity: button.automower_man
        tap_action:
          action: call-service
          service: button.press
          service_data:
            entity_id: button.automower_man
        styles:
          card:
            - height: 40px
            - border: 0px solid var(--primary-background-color)
            - background: |
                [[[
                  if (states['sensor.automower_mower_mode'].state == '1' )
                    return 'var(--state-vacuum-17-color, var(--state-vacuum-active-color, var(--state-active-color)))'
                  return ''
                ]]]
            - font-size: 11px
            - '--keep-background': 'true'
      - show_name: false
        show_icon: true
        type: custom:button-card
        tap_action:
          action: call-service
          service: button.press
          service_data:
            entity_id: button.automower_eod
        entity: button.automower_eod
        styles:
          card:
            - height: 40px
            - border: 0px solid var(--primary-background-color)
            - background: |
                [[[
                  if (states['sensor.automower_mower_mode'].state == '2' )
                    return 'var(--state-vacuum-17-color, var(--state-vacuum-active-color, var(--state-active-color)))'
                  return ''
                ]]]
            - font-size: 11px
            - '--keep-background': 'true'
  - type: horizontal-stack
    cards:
      - entities:
          - entity: sensor.automower_battery_0
            attribute: voltage
            unit: V
            index: 0
        show:
          icon: false
        font_size: 80
        name: Batt (V)
        decimals: 1
        animate: true
        color_thresholds:
          - value: 0
            color: red
          - value: 17
            color: orange
          - value: 19.3
            color: green
        type: custom:mini-graph-card
        card_mod:
          style: |
            ha-card {
              border-width: 0;
              border-radius: 0
            }
      - entities:
          - entity: sensor.automower_battery_0
            index: 0
        show:
          icon: false
        font_size: 80
        name: Batt (%)
        decimals: 1
        animate: true
        color_thresholds:
          - value: -2500
            color: red
          - value: -1000
            color: orange
          - value: 0
            color: green
        type: custom:mini-graph-card
        card_mod:
          style: |
            ha-card {
              border-width: 0;
              border-radius: 0
            }
      - entities:
          - entity: sensor.automower_battery_0
            attribute: temperature
            unit: °C
            index: 0
        show:
          state: true
          icon: false
        font_size: 80
        name: Batt (°C)
        decimals: 1
        animate: true
        color_thresholds:
          - value: 0
            color: red
          - value: 10
            color: green
          - value: 30
            color: red
        type: custom:mini-graph-card
        card_mod:
          style: |
            ha-card {
              border-width: 0;
              border-radius: 0
            }
Änderungsprotokoll
06/2023: Veröffentlichung des Beitrages
Hallo,
was bewirken denn die beiden Button „Hände“ und „Sonnenuntergang“?
Danke und Grüße
Duc
Hände ist der manuelle Modus. Sonnenuntergang ist der Modus Feierabend. Der Roboter startet am nächsten Tag mit dem ganz normalen Programm.
Die Verbindung zum Robi konnte ich herstellen. Wenn ich jedoch deinen Code kopiere und einstelle, erscheinen bei mir nur die drei Werte der Battery. Der Rest wird nicht erkannt. ich habe folgende Fehlermeldung vacuum.automower_robonect – Entität nicht gefunden und ein Großteil, der im Code beschriebenen Entitäten werden mir gar nicht als Sensor zur Verfügung gestellt. Fehlt mir noch etwas? BG
Danke! Super Integration, sehr hilfreich
Hi,
hat super funktioniert.
Was aber mega wäre, wäre eine Anleitung wie ich über Homeassistant einen manuellen Mähauftrag erstellen kann wie bei der robonect app.
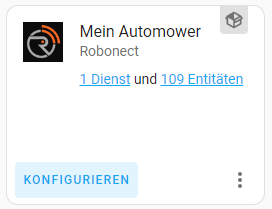
Hallo, ich habe das gleiche Problem wie Shaun es bereits am 11. Juni 2023 beschrieben hat. Ich habe in der Robonect Integration auch nur 24 Entitäten und nicht wie oben aufgeführt über 100.
Wo liegt denn mein Fehler? Beste Grüße und vielen Dank vorab.
Vielen Dank, hat super geklappt
Bei mir erscheinen ebenfalls nur 24 Entitäten, kann mir jemand sagen wo der Fehler liegt.